
Rehabilitating Wrist and Hand Pain Part II
Dr Alexander Green
NOVA Headache & Chiropractic Center
In this article we will continue our discussion of hand/wrist rehab by beginning to address some of the regions of the body that influence the wrist and hand:
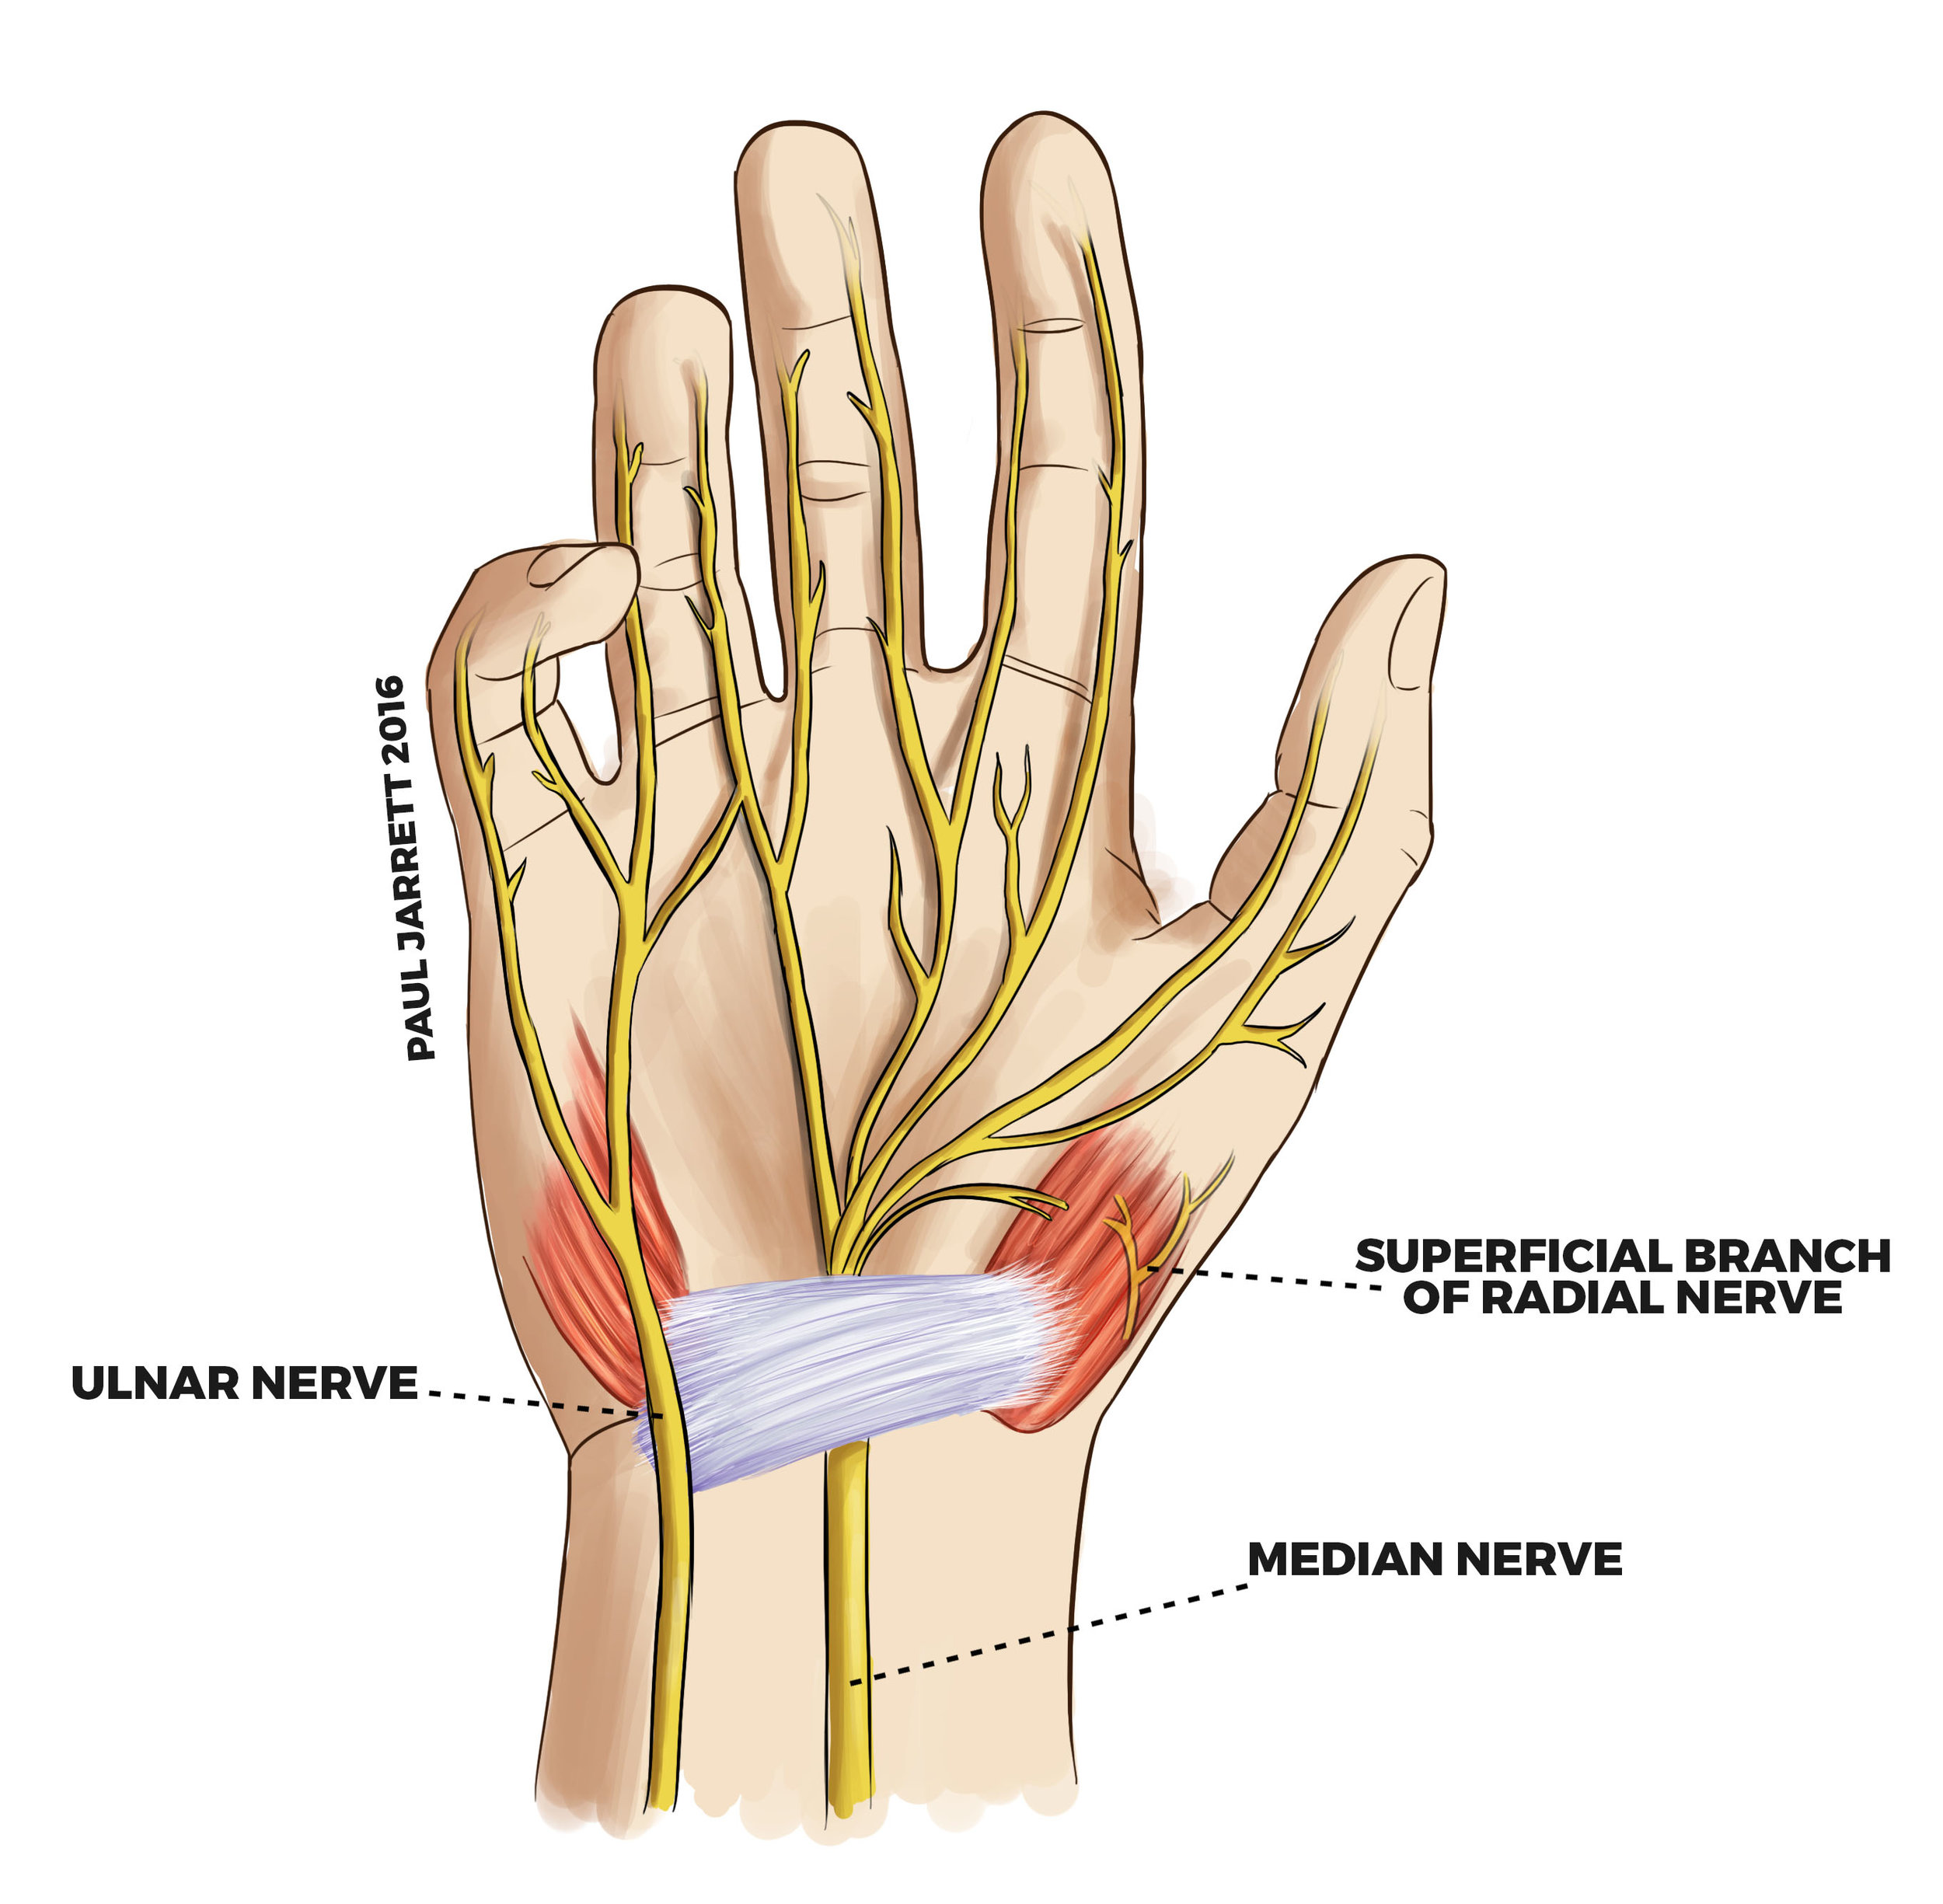
The first region we will be taking a look at is the neck. We discussed earlier that all of the nerves that control motor and sensory function in the hand originate in the neck. These nerves exit the next in between spinal bones. Stress and strain in the neck can influence the function of the nerves, and can even cause pain or numbness that travels down to the hand. Abnormal stresses are placed on the body whenever we deviate from an “ideal” or neutral posture.


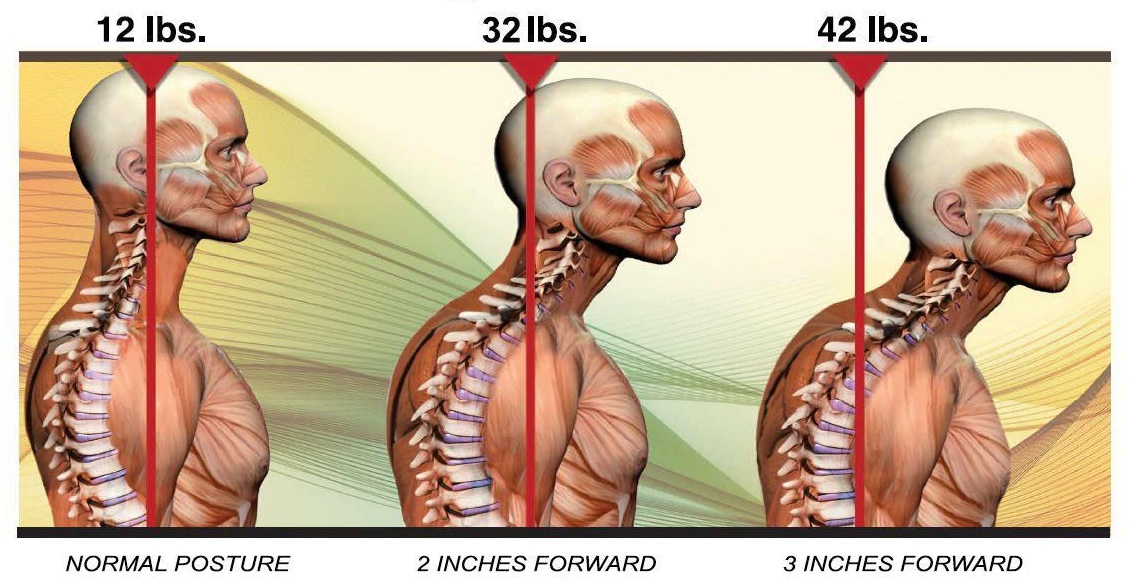
In order to better explain the rehab exercise below, we must first talk about what we should be aiming for when we talk about having “good” posture. When talking about the neck, a neutral posture means that the opening of the ear is in line with the shoulder. In this position, the compression and shearing forces placed through the joints and discs of the neck are equivalent to the weight of the head (~8-12lbs). If the head and neck move forward from this position, the shearing and compressive forces increase dramatically. If you are having difficulty visualizing this, try holding a weight close to your body for a few seconds, and then try to hold that same weight at arms length away from the body. In which position are you feeling more strain on the muscles and stress on the joints?
The goal of the first exercise is to bring the head and neck into a neutral position, so as to reduce the stress on that area.
Step 1: In a seated position, place your feet firmly on the floor, hip width apart. There should be a 90 degree angle at the knee and hip (you should not be slouching)
Step 2: Place two fingers of one hand on the chin, and push the head back so that you bring the ear in line with your shoulder
Step 3: Maintain your head and neck position, while bringing the arms out to the side. Rotate the arms so that the thumbs are pointed backwards. (your shoulder should be relaxed- do not try and pinch the shoulder blades together)
Step 4: Hold all the postural queues discussed above for a 3-5 second count before relaxing. Repeat.
**Start with trying to perform 25 repetitions per day, and work up from there. Remember that when trying to make a postural change, we are not simply trying to strengthen muscles, we are trying to create new neurological pathways- we want to change the way your brain is choosing to move and stabilize your body. Making these types of changes takes time, and consistent (daily) effort. **

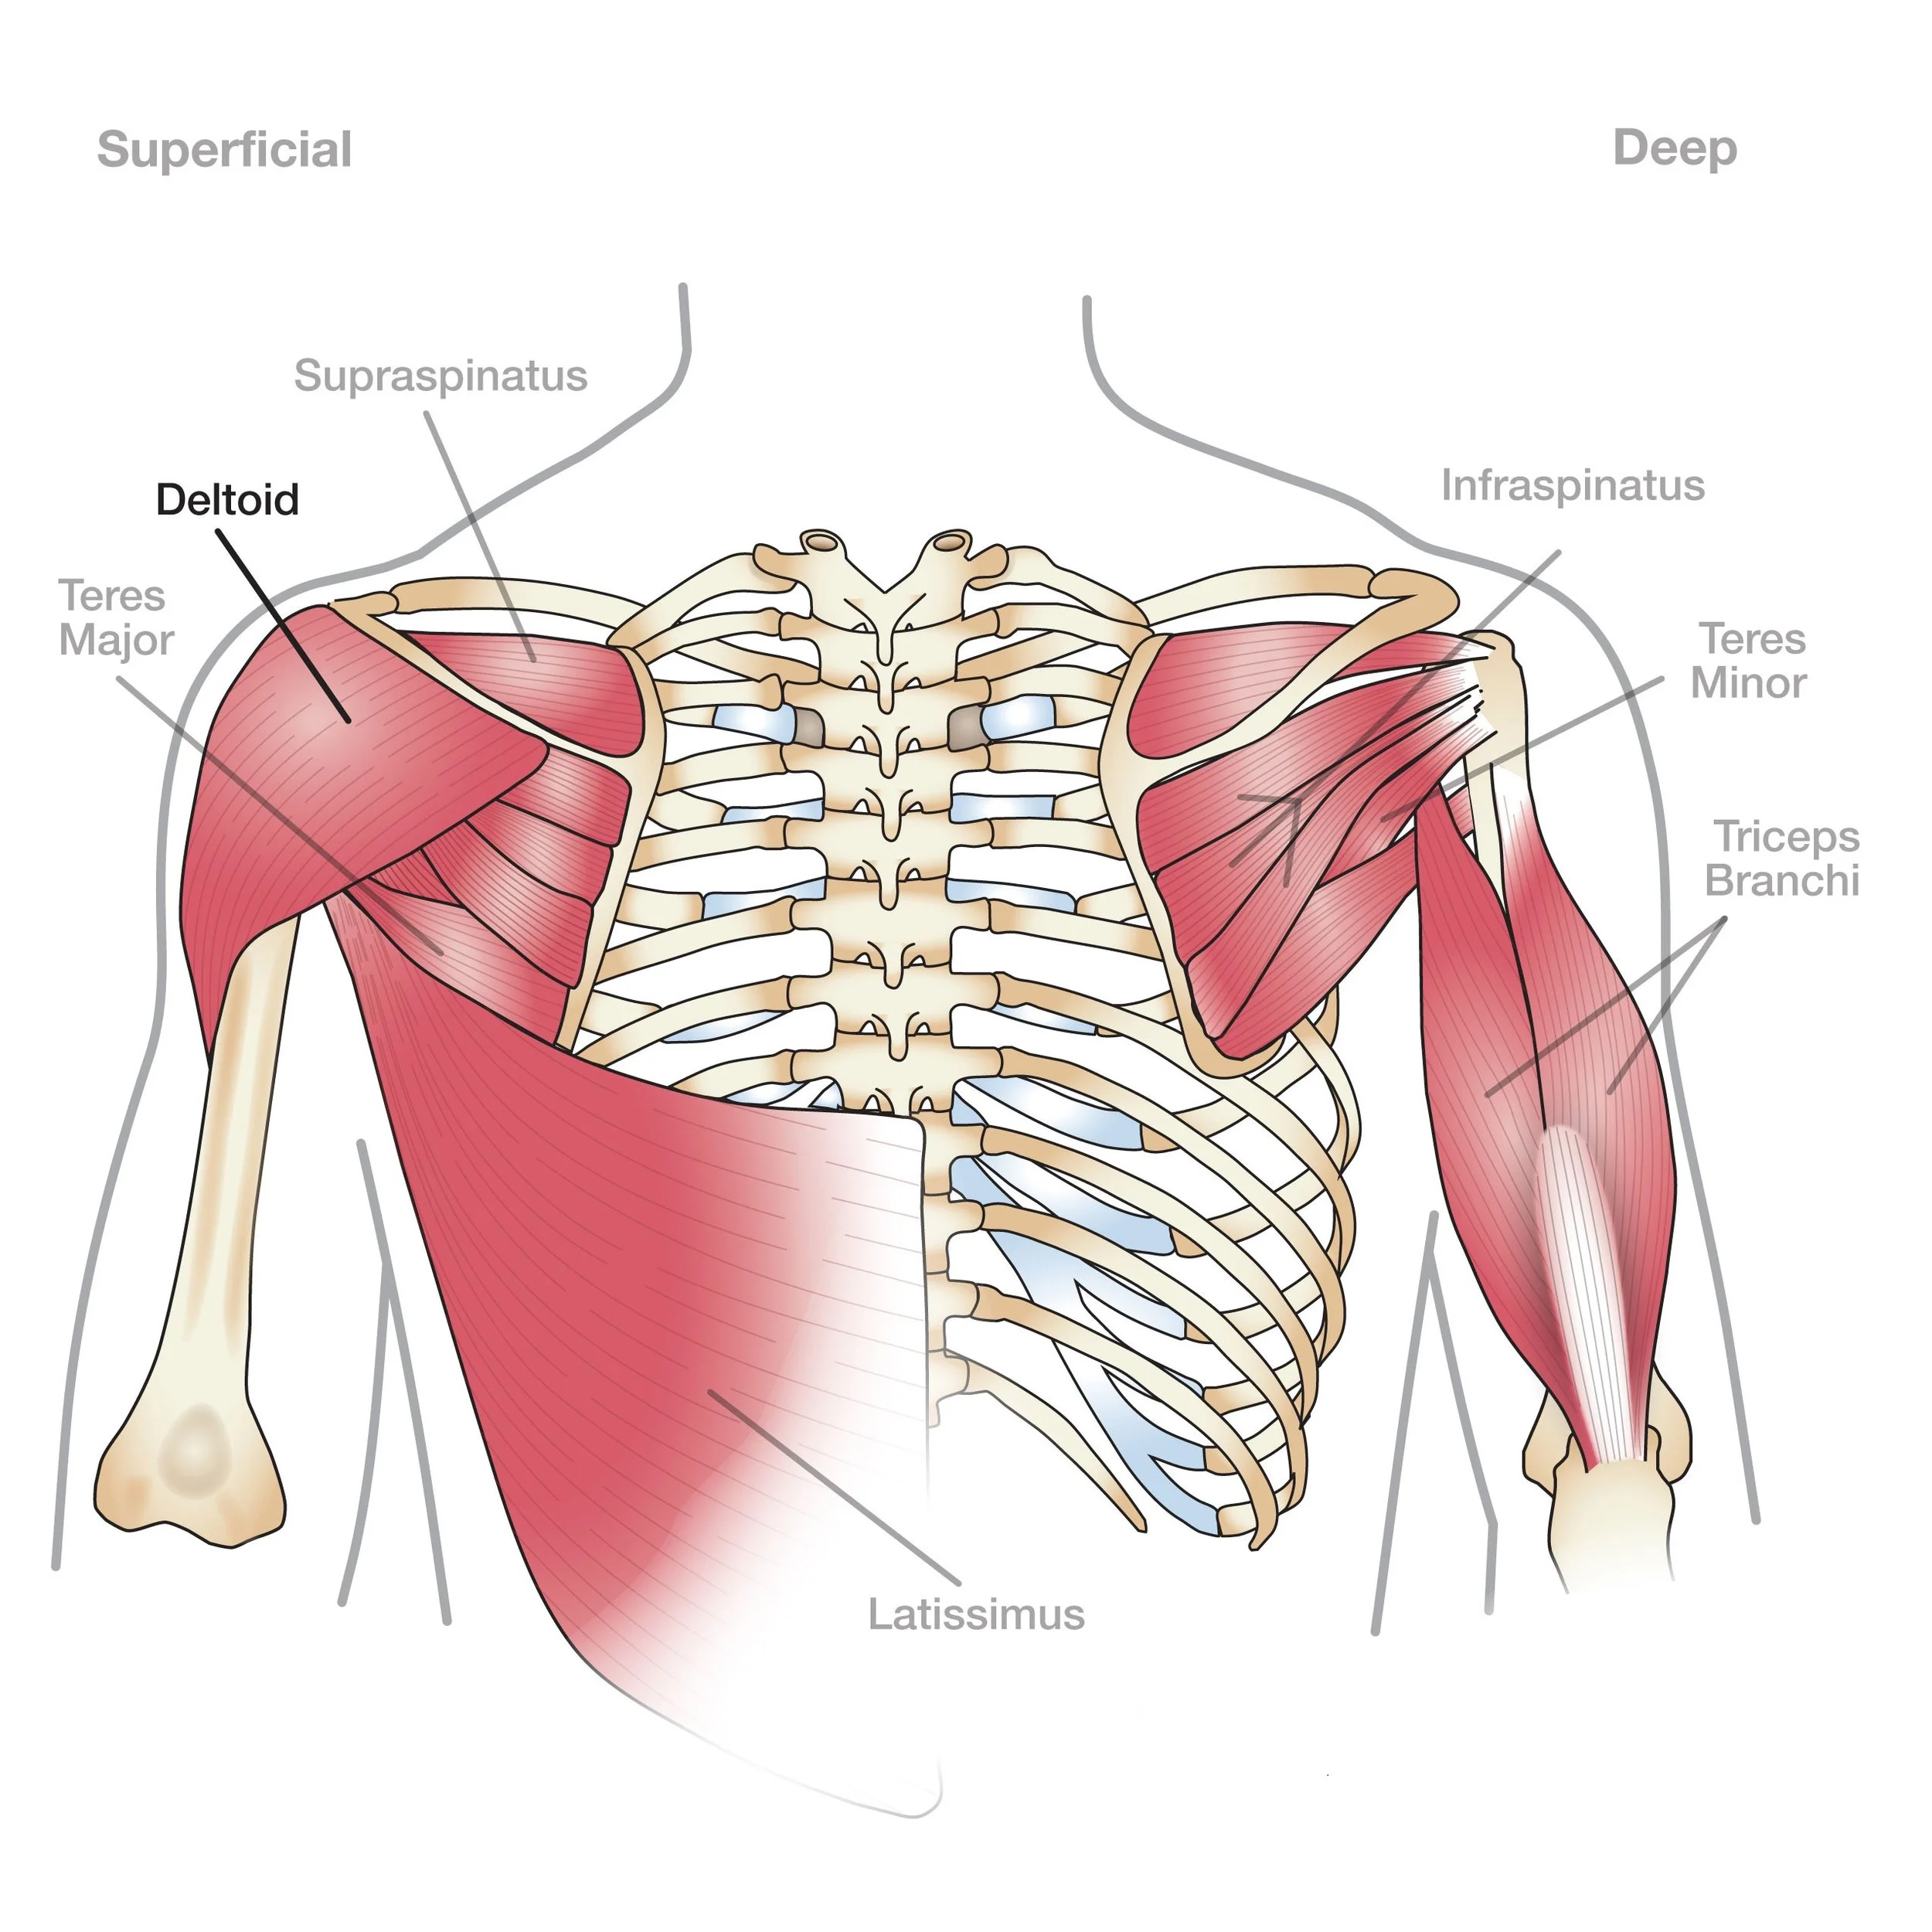
The next few exercises will be more focused on the mechanics of the shoulder blade. The function of the shoulder blade is to act as an anchor point for the shoulder complex. The shoulder complex influences not only the hand but also the neck. The shoulder blade is most stable when the muscles below it and the muscles above it are activating symmetrically. Keep this in mind when looking at the next few movements.

This exercise is aimed at activating the muscles below the shoulder blade:
Step 1: Anchor your resistance band to a point that is at or above eye level.
Step 2: With arms outstretched in front of you, grab the resistance band in both hands- palms facing each other, and step away from the anchor point until there is some tension on the bands (the bands should not be slack at any point)
Step 3: Set your head and neck in a neutral position (as discussed in the postural exercise above)
Step 4: Pull the hands towards your hips. Stop when your hands have reached either side of your hips and hold this position for at least 1 second, before slowly resisting the bands as you return your arms to the starting position (step 2)
Step 5: Repeat. Try to do 2 sets of 10 reps, but remember- fewer repetitions with better form will be more helpful to you than more reps with poor form!

The last exercise focuses on activation of the muscle above the shoulder blade:
Step 1: Anchor the resistance band at chest level, or slightly below.
Step 2: Grasp the resistance band in one hand. Note that the side holding the resistance band should be the side that is furthest from the anchor point.
Step 3: Place your elbow at 90 degrees , and hold it close to your side (this position should stay the same throughout the exercise). Step away from the anchor point so there is tension on the band.
Step 4: Keep the wrist neutral as you rotate the arm away from the body. When you have rotated the arm as far away as you can from your body, hold this position for at least 1-3 seconds.
Step 5: Repeat. You should seek to keep the resistance lighter for this exercise and the repetitions lower, as the muscles that are above the shoulder blade are smaller and more susceptible to injury if overused.
